Building React Apps in an Nx Monorepo
In this tutorial you'll learn how to use React with Nx in a monorepo setup.
What will you learn?
- how to create a new React application
- how to run a single task (i.e. serve your app) or run multiple tasks in parallel
- how to leverage code generators to scaffold components
- how to modularize your codebase and impose architectural constraints for better maintainability
- how to speed up CI with Nx Cloud ⚡
Why Use an Nx Monorepo?
Nx works along side your existing tooling to improve your experience developing in a monorepo. You can also use code generators that Nx provides to quickly spin up a new project that is pre-configured with industry standard tooling. In this tutorial, we'll set up a monorepo that leverages the same tooling you would typically use without Nx, but Nx will enable you to focus your time on the features of your application rather than the tooling that surrounds it.
We'll use npm/yarn/pnpm workspaces to link projects and TypeScript project references to incrementally typecheck the repository. Nx works well whether you have a single version policy or have each project separately define their dependencies, but in this tutorial we'll define all dependencies in a single package.json at the root of the repository.
Nx generators will automatically configure new projects with useful tools like Prettier, ESLint and Jest. Those generators will also make sure that each project is referenced correctly in the root workspaces property and the tsconfig references properties accurately reflect the dependencies of each project.
Nx Plugins are optional packages that extend the capabilities of Nx, catering to various specific technologies. For instance, we have plugins tailored to React (e.g., @nx/react), Vite (@nx/vite), Cypress (@nx/cypress), and more. These plugins offer additional features, making your development experience more efficient and enjoyable when working with specific tech stacks.
Features we'll use in this monorepo:
- Install dependencies at the root by default
- Scaffold new code with generators
- Updates dependencies with automated migrations
Visit our "Why Nx" page for more details.
Final Code
Here's the source code of the final result for this tutorial.
Example repository/nrwl/nx-recipes/tree/main/react-monorepo
Creating a new React Monorepo
Create a new React monorepo with the following command:
~❯
npx create-nx-workspace@latest react-monorepo --preset=react-monorepo --workspaces
1
2NX   Let's create a new workspace [https://nx.dev/getting-started/intro]
3
4✔ Application name · react-store
5✔ Which bundler would you like to use? · vite
6✔ Which unit test runner would you like to use? · vitest
7✔ Test runner to use for end to end (E2E) tests · cypress
8✔ Default stylesheet format · css
9✔ Would you like to use ESLint? · Yes
10✔ Would you like to use Prettier for code formatting? · Yes
11✔ Which CI provider would you like to use? · github
12
Let's name the initial application react-store. In this tutorial we're going to use vite as a bundler, vitest for unit testing, cypress for e2e tests, css for styling and also include ESLint and Prettier. We'll talk more about how Nx integrates with GitHub Actions later in the tutorial. The above command generates the following structure:
1└─ react-monorepo
2   ├─ ...
3   ├─ apps
4   │  ├─ react-store
5   │  │  ├─ public
6   │  │  │  └─ ...
7   │  │  ├─ src
8   │  │  │  ├─ app
9   │  │  │  │  ├─ app.module.css
10   │  │  │  │  ├─ app.spec.tsx
11   │  │  │  │  ├─ app.tsx
12   │  │  │  │  └─ nx-welcome.tsx
13   │  │  │  ├─ assets
14   │  │  │  ├─ main.tsx
15   │  │  │  └─ styles.css
16   │  │  ├─ index.html
17   │  │  ├─ package.json
18   │  │  ├─ tsconfig.app.json
19   │  │  ├─ tsconfig.json
20   │  │  ├─ tsconfig.spec.json
21   │  │  └─ vite.config.ts
22   │  └─ react-store-e2e
23   │     └─ ...
24   ├─ nx.json
25   ├─ tsconfig.base.json
26   └─ package.json
27
The setup includes..
- a new React application (
apps/react-store/) - a Playwright based set of e2e tests (
apps/react-store-e2e/) - Prettier preconfigured
- ESLint preconfigured
- Vitest preconfigured
One way to structure an Nx monorepo is to place application projects in the apps folder and library projects in the libs folder. Applications are encouraged to be as light-weight as possible so that more code is pushed into libraries and can be reused in other projects. This folder structure is just a suggestion and can be modified to suit your organization's needs.
The nx.json file contains configuration settings for Nx itself and global default settings that individual projects inherit.
Serving the App
To serve your new React application, just run:
❯
npx nx serve react-store
Your application should be served at http://localhost:4200.
Nx uses the following syntax to run tasks:

Inferred Tasks
Nx identifies available tasks for your project from tooling configuration files, package.json scripts and the targets defined in project.json. To view the tasks that Nx has detected, look in the Nx Console project detail view or run:
❯
npx nx show project react-store
react-store
Root: apps/react-store
Type:application
Targets
build
vite build
Cacheable
If you expand the build task, you can see that it was created by the @nx/vite plugin by analyzing your vite.config.ts file. Notice the outputs are defined as {projectRoot}/dist. This value is being read from the build.outDir defined in your vite.config.ts file. Let's change that value in your vite.config.ts file:
1export default defineConfig({
2  // ...
3  build: {
4    outDir: './build',
5    // ...
6  },
7});
8
Now if you look at the project details view, the outputs for the build target will say {projectRoot}/build. This feature ensures that Nx will always cache the correct files.
You can also override the settings for inferred tasks by modifying the targetDefaults in nx.json or setting a value in your package.json file. Nx will merge the values from the inferred tasks with the values you define in targetDefaults and in your specific project's configuration.
Set the outDir back to ./dist so that we don't have to modify all the other tools to account for a different build output folder.
1export default defineConfig({
2  // ...
3  build: {
4    outDir: './dist',
5    // ...
6  },
7});
8
Add Another Application
Nx plugins usually provide generators that allow you to easily scaffold code, configuration or entire projects. To see what capabilities the @nx/react plugin provides, run the following command and inspect the output:
react-monorepo❯
npx nx list @nx/react
1
2NX   Capabilities in @nx/react:
3
4   GENERATORS
5
6   init : Initialize the `@nx/react` plugin.
7   application : Create a React application.
8   library : Create a React library.
9   component : Create a React component.
10   redux : Create a Redux slice for a project.
11   storybook-configuration : Set up storybook for a React app or library.
12   component-story : Generate storybook story for a React component
13   stories : Create stories/specs for all components declared in an app or library.
14   hook : Create a hook.
15   cypress-component-configuration : Setup Cypress component testing for a React project
16   component-test : Generate a Cypress component test for a React component
17   setup-tailwind : Set up Tailwind configuration for a project.
18   setup-ssr : Set up SSR configuration for a project.
19   host : Generate a host react application
20   remote : Generate a remote react application
21   federate-module : Federate a module.
22
23   EXECUTORS/BUILDERS
24
25   module-federation-dev-server : Serve a host or remote application.
26   module-federation-ssr-dev-server : Serve a host application along with it's known remotes.
27If you prefer a more integrated experience, you can install the "Nx Console" extension for your code editor. It has support for VSCode, IntelliJ and ships a LSP for Vim. Nx Console provides autocompletion support in Nx configuration files and has UIs for browsing and running generators.
More info can be found in the integrate with editors article.
Run the following command to generate a new inventory application. Note how we append --dry-run to first check the output.
react-monorepo❯
npx nx g @nx/react:app apps/inventory
1 NX  Generating @nx/react:application
2
3✔ Would you like to add React Router to this application? (y/N) · false
4✔ What unit test runner should be used? · vitest
5✔ Which E2E test runner would you like to use? · cypress
6CREATE apps/inventory/index.html
7CREATE apps/inventory/public/favicon.ico
8CREATE apps/inventory/src/app/app.spec.tsx
9CREATE apps/inventory/src/assets/.gitkeep
10CREATE apps/inventory/src/main.tsx
11CREATE apps/inventory/tsconfig.app.json
12CREATE apps/inventory/src/app/nx-welcome.tsx
13CREATE apps/inventory/src/app/app.module.css
14CREATE apps/inventory/src/app/app.tsx
15CREATE apps/inventory/src/styles.css
16CREATE apps/inventory/tsconfig.json
17CREATE apps/inventory/package.json
18UPDATE nx.json
19CREATE apps/inventory/tsconfig.spec.json
20CREATE apps/inventory/vite.config.ts
21CREATE apps/inventory/eslint.config.mjs
22CREATE apps/inventory-e2e/package.json
23CREATE apps/inventory-e2e/src/e2e/app.cy.ts
24CREATE apps/inventory-e2e/src/support/app.po.ts
25CREATE apps/inventory-e2e/src/support/e2e.ts
26CREATE apps/inventory-e2e/src/fixtures/example.json
27CREATE apps/inventory-e2e/src/support/commands.ts
28CREATE apps/inventory-e2e/cypress.config.ts
29CREATE apps/inventory-e2e/tsconfig.json
30UPDATE tsconfig.json
31CREATE apps/inventory-e2e/eslint.config.mjs
32
33NOTE: The "dryRun" flag means no changes were made.
34
As you can see, it generates a new application in the apps/inventory/ folder. Let's actually run the generator by removing the --dry-run flag.
❯
npx nx g @nx/react:app apps/inventory
Share Code with Local Libraries
When you develop your React application, usually all your logic sits in the app folder. Ideally separated by various folder names which represent your "domains". As your app grows, however, the app becomes more and more monolithic and the code is unable to be shared with other applications.
1└─ react-monorepo
2   ├─ ...
3   ├─ apps
4   │  └─ react-store
5   │     ├─ ...
6   │     ├─ src
7   │     │  ├─ app
8   │     │  │  ├─ products
9   │     │  │  ├─ cart
10   │     │  │  ├─ ui
11   │     │  │  ├─ ...
12   │     │  │  └─ app.tsx
13   │     │  ├─ ...
14   │     │  └─ main.tsx
15   │     ├─ ...
16   │     └─ package.json
17   ├─ nx.json
18   ├─ ...
19
Nx allows you to separate this logic into "local libraries". The main benefits include
- better separation of concerns
- better reusability
- more explicit "APIs" between your "domain areas"
- better scalability in CI by enabling independent test/lint/build commands for each library
- better scalability in your teams by allowing different teams to work on separate libraries
Create Local Libraries
Let's assume our domain areas include products, orders and some more generic design system components, called ui. We can generate a new library for each of these areas using the React library generator:
1npx nx g @nx/react:library libs/products --unitTestRunner=vitest --bundler=none
2npx nx g @nx/react:library libs/orders --unitTestRunner=vitest --bundler=none
3npx nx g @nx/react:library libs/shared/ui --unitTestRunner=vitest --bundler=none
4
Note how we type out the full path in the directory flag to place the libraries into a subfolder. You can choose whatever folder structure you like to organize your projects. If you change your mind later, you can run the move generator to move a project to a different folder.
Running the above commands should lead to the following directory structure:
1└─ react-monorepo
2   ├─ ...
3   ├─ apps
4   ├─ libs
5   │  ├─ products
6   │  │  ├─ ...
7   │  │  ├─ package.json
8   │  │  ├─ src
9   │  │  │  ├─ index.ts
10   │  │  │  └─ lib
11   │  │  │     ├─ products.spec.ts
12   │  │  │     └─ products.ts
13   │  │  ├─ tsconfig.json
14   │  │  ├─ tsconfig.lib.json
15   │  │  ├─ tsconfig.spec.json
16   │  │  └─ vite.config.ts
17   │  ├─ orders
18   │  │  ├─ ...
19   │  │  ├─ package.json
20   │  │  ├─ src
21   │  │  │  ├─ index.ts
22   │  │  │  └─ ...
23   │  │  └─ ...
24   │  └─ shared
25   │     └─ ui
26   │        ├─ ...
27   │        ├─ package.json
28   │        ├─ src
29   │        │  ├─ index.ts
30   │        │  └─ ...
31   │        └─ ...
32   ├─ ...
33
Each of these libraries
- has a project details view where you can see the available tasks (e.g. running tests for just orders:
npx nx test orders) - has its own
package.jsonfile where you can customize targets - has the name you specified in the generate command; you can find the name in the corresponding
package.jsonfile - has a dedicated
index.tsfile which is the "public API" of the library - is included in the
workspacesproperty of thepackage.jsonfile at the root of the workspace
Import Libraries into the React Applications
All libraries that we generate are automatically included in the workspaces defined in the root-level package.json.
1{
2  "workspaces": ["apps/*", "libs/*", "libs/shared/*"]
3}
4
Hence we can easily import them into other libraries and our React application. As an example, let's use the pre-generated ProductsComponent component from our libs/products library.
You can see that the Products component is exported via the index.ts file of our products library so that other projects in the repository can use it. This is our public API with the rest of the workspace. Only export what's really necessary to be usable outside the library itself.
1export * from './lib/products';
2
We're ready to import it into our main application now. First (if you haven't already), let's set up React Router.
❯
npm add react-router-dom
Configure it in the main.tsx.
1import { StrictMode } from 'react';
2import { BrowserRouter } from 'react-router-dom';
3import ReactDOM from 'react-dom/client';
4
5import App from './app/app';
6
7const root = ReactDOM.createRoot(
8  document.getElementById('root') as HTMLElement
9);
10
11root.render(
12  <StrictMode>
13    <BrowserRouter>
14      <App />
15    </BrowserRouter>
16  </StrictMode>
17);
18
Then we can import the Products component into our app.tsx and render it via the routing mechanism whenever a user hits the /products route.
1import { Route, Routes } from 'react-router-dom';
2
3// importing the component from the library
4import { Products } from '@react-monorepo/products';
5
6function Home() {
7  return <h1>Home</h1>;
8}
9
10export function App() {
11  return (
12    <Routes>
13      <Route path="/" element={<Home />}></Route>
14      <Route path="/products" element={<Products />}></Route>
15    </Routes>
16  );
17}
18
19export default App;
20
Serving your app (npx nx serve react-store) and then navigating to /products should give you the following result:
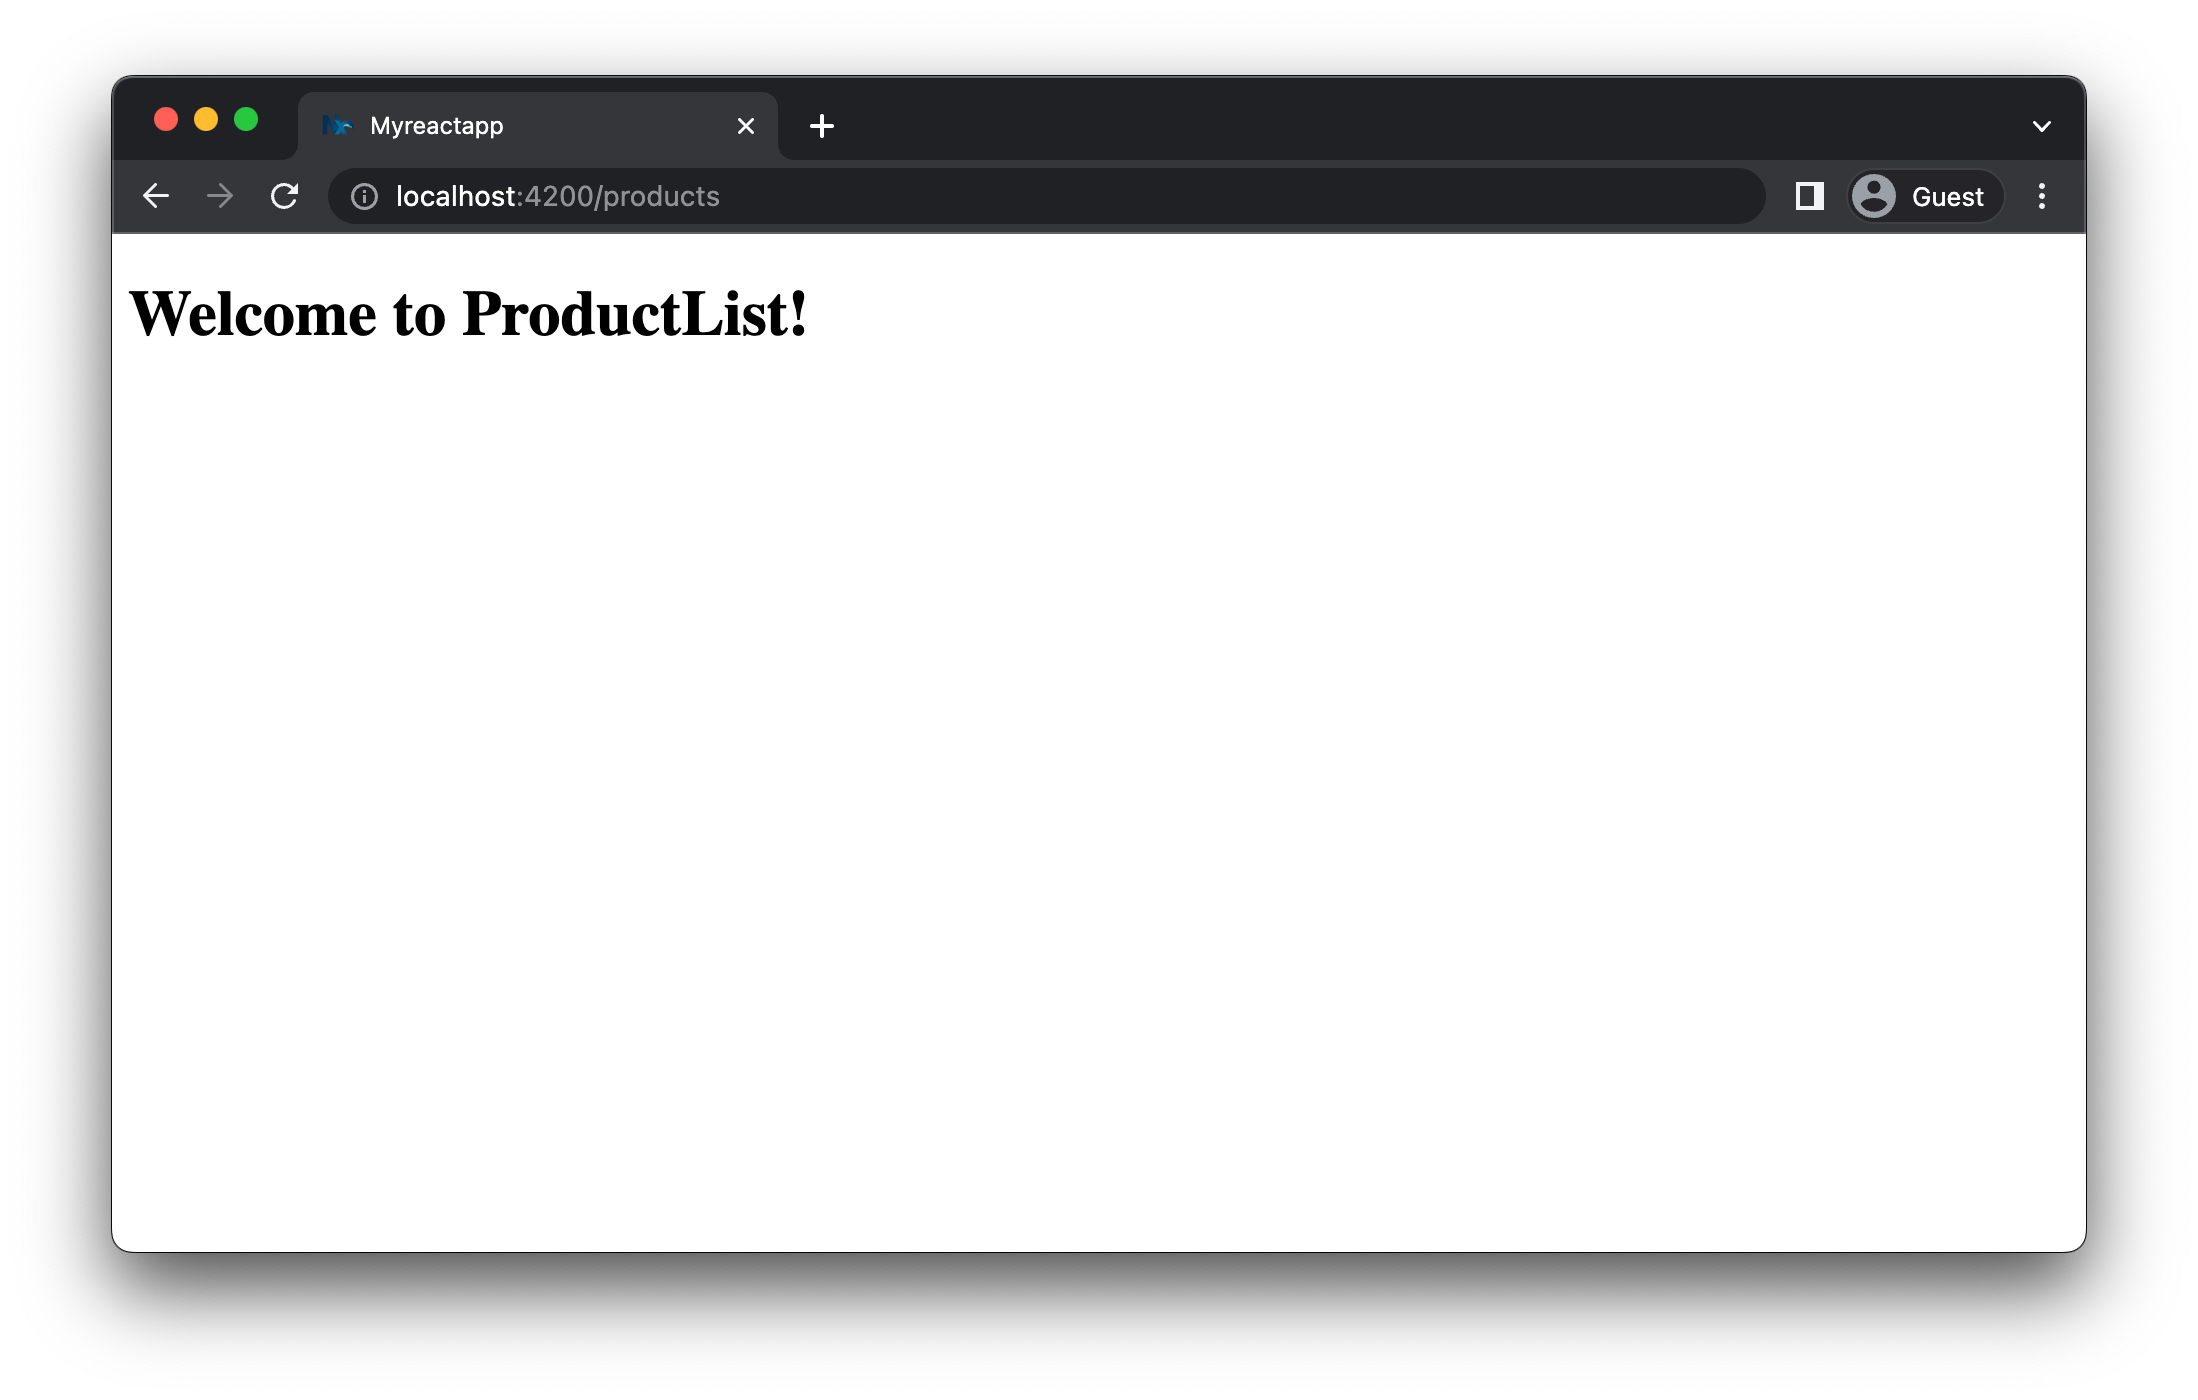
Let's apply the same for our orders library.
- import the
Orderscomponent fromlibs/ordersinto theapp.tsxand render it via the routing mechanism whenever a user hits the/ordersroute
In the end, your app.tsx should look similar to this:
1import { Route, Routes } from 'react-router-dom';
2import { Products } from '@react-monorepo/products';
3import { Orders } from '@react-monorepo/orders';
4
5function Home() {
6  return <h1>Home</h1>;
7}
8
9export function App() {
10  return (
11    <Routes>
12      <Route path="/" element={<Home />}></Route>
13      <Route path="/products" element={<Products />}></Route>
14      <Route path="/orders" element={<Orders />}></Route>
15    </Routes>
16  );
17}
18
19export default App;
20
Let's also show products in the inventory app.
1import { Products } from '@react-monorepo/products';
2
3export function App() {
4  return <Products />;
5}
6
7export default App;
8
Visualize your Project Structure
Nx automatically detects the dependencies between the various parts of your workspace and builds a project graph. This graph is used by Nx to perform various optimizations such as determining the correct order of execution when running tasks like npx nx build, identifying affected projects and more. Interestingly you can also visualize it.
Just run:
❯
npx nx graph
You should be able to see something similar to the following in your browser.
Notice how ui is not yet connected to anything because we didn't import it in any of our projects.
Exercise for you: change the codebase such that ui is used by orders and products. Note: you need to restart the npx nx graph command to update the graph visualization or run the CLI command with the --watch flag.
Testing and Linting - Running Multiple Tasks
Our current setup doesn't just come with targets for serving and building the React application, but also has targets for unit testing, e2e testing and linting. Again, these are defined in the project.json file. We can use the same syntax as before to run these tasks:
1npx nx test react-store # runs the tests for react-store
2npx nx lint inventory # runs the linter on inventory
3npx nx e2e react-store-e2e # runs e2e tests for the react-store
4
More conveniently, we can also run tasks in parallel using the following syntax:
❯
npx nx run-many -t test
Cache Tasks
One thing to highlight is that Nx is able to cache the tasks you run.
Note that all of these targets are automatically cached by Nx. If you re-run a single one or all of them again, you'll see that the task completes immediately. In addition, (as can be seen in the output example below) there will be a note that a matching cache result was found and therefore the task was not run again.
react-monorepo❯
npx nx run-many -t test lint e2e
1✔  nx run @react-monorepo/ui:lint  [existing outputs match the cache, left as is]
2✔  nx run inventory-e2e:lint  [existing outputs match the cache, left as is]
3✔  nx run react-store-e2e:lint  [existing outputs match the cache, left as is]
4✔  nx run @react-monorepo/ui:test  [existing outputs match the cache, left as is]
5
6——————————————————————————————————————————————————————
7
8NX   Successfully ran targets test, lint, e2e for 7 projects (54ms)
9
10Nx read the output from the cache instead of running the command for 10 out of 10 tasks.
11
Not all tasks might be cacheable though. You can configure the cache settings in the targetDefaults property of the nx.json file. You can also learn more about how caching works.
Test Affected Projects
Commit your changes to git.
❯
git commit -a -m "some commit message"
And then make a small change to the products library.
1import styles from './products.module.css';
2
3export function Products() {
4  return (
5    <div className={styles['container']}>
6      <h1>Welcome to Products!</h1>
7      <p>This is a change. 👋</p>
8    </div>
9  );
10}
11
12export default Products;
13
One of the key features of Nx in a monorepo setting is that you're able to run tasks only for projects that are actually affected by the code changes that you've made. To run the tests for only the projects affected by this change, run:
❯
npx nx affected -t test
Note that the unit tests were run for products, react-store and inventory, but not for orders because a change to products can not possibly break the tests for orders. In a small repo like this, there isn't a lot of time saved, but as there are more tests and more projects, this quickly becomes an essential command.
You can also see what projects are affected in the graph visualizer with;
❯
npx nx graph --affected
Build the Apps for Deployment
If you're ready and want to ship your applications, you can build them using
react-monorepo❯
npx nx run-many -t build
1   ✔  nx run @react-monorepo/inventory:build (841ms)
2   ✔  nx run @react-monorepo/react-store:build (968ms)
3
4—————————————————————————————————————————————————————————————
5
6 NX   Successfully ran target build for 2 projects (1s)
7
All the required files will be placed in /apps/react-store/dist and /apps/inventory/dist and can be deployed to your favorite hosting provider.
Nx will run any script defined in package.json, so you can create a deploy task that sends the build output to your hosting provider.
1{
2  "scripts": {
3    "deploy": "netlify deploy --dir=dist"
4}
5
We want to let Nx know that the build task needs to be run before the deploy task, so we add a dependsOn property for that target.
1{
2  "scripts": {
3    "deploy": "netlify deploy --dir=dist"
4  },
5  "nx": {
6    "targets": {
7      "deploy": {
8        "dependsOn": ["build"]
9      }
10    }
11  }
12}
13
If you want to keep the script next to its Nx configuration, you can rewrite the above configuration like this:
1{
2  "scripts": {},
3  "nx": {
4    "targets": {
5      "deploy": {
6        "command": "netlify deploy --dir=dist",
7        "dependsOn": ["build"]
8      }
9    }
10  }
11}
12
Replace the deploy script with whatever terminal command you use to deploy your site.
The "dependsOn": ["build"] setting tells Nx to make sure that the project's build task has been run successfully before the deploy task.
With the deploy tasks defined, you can deploy a single application with npx nx deploy react-store or deploy any applications affected by the current changes with:
❯
npx nx affected -t deploy
Imposing Constraints with Module Boundary Rules
Once you modularize your codebase you want to make sure that the libs are not coupled to each other in an uncontrolled way. Here are some examples of how we might want to guard our small demo workspace:
- we might want to allow
ordersto import fromshared-uibut not the other way around - we might want to allow
ordersto import fromproductsbut not the other way around - we might want to allow all libraries to import the
shared-uicomponents, but not the other way around
When building these kinds of constraints you usually have two dimensions:
- type of project: what is the type of your library. Example: "feature" library, "utility" library, "data-access" library, "ui" library
- scope (domain) of the project: what domain area is covered by the project. Example: "orders", "products", "shared" ... this really depends on the type of product you're developing
Nx comes with a generic mechanism that allows you to assign "tags" to projects. "tags" are arbitrary strings you can assign to a project that can be used later when defining boundaries between projects. For example, go to the package.json of your orders library and assign the tags type:feature and scope:orders to it.
1{
2  ...
3  "nx": {
4    "tags": ["type:feature", "scope:orders"]
5  }
6}
7
Then go to the project.json of your products library and assign the tags type:feature and scope:products to it.
1{
2  ...
3  "nx": {
4    "tags": ["type:feature", "scope:products"]
5  }
6}
7
Finally, go to the project.json of the shared-ui library and assign the tags type:ui and scope:shared to it.
1{
2  ...
3  "nx": {
4    "tags": ["type:ui", "scope:shared"]
5  }
6}
7
Notice how we assign scope:shared to our UI library because it is intended to be used throughout the workspace.
Next, let's come up with a set of rules based on these tags:
type:featureshould be able to import fromtype:featureandtype:uitype:uishould only be able to import fromtype:uiscope:ordersshould be able to import fromscope:orders,scope:sharedandscope:productsscope:productsshould be able to import fromscope:productsandscope:shared
To enforce the rules, Nx ships with a custom ESLint rule. Open the .eslintrc.base.json at the root of the workspace and add the following depConstraints in the @nx/enforce-module-boundaries rule configuration:
1import nx from '@nx/eslint-plugin';
2
3export default [
4  // ...
5  {
6    files: ['**/*.ts', '**/*.tsx', '**/*.js', '**/*.jsx'],
7    rules: {
8      '@nx/enforce-module-boundaries': [
9        'error',
10        {
11          enforceBuildableLibDependency: true,
12          allow: ['^.*/eslint(\\.base)?\\.config\\.[cm]?js$'],
13          depConstraints: [
14            {
15              sourceTag: 'type:feature',
16              onlyDependOnLibsWithTags: ['type:feature', 'type:ui'],
17            },
18            {
19              sourceTag: 'type:ui',
20              onlyDependOnLibsWithTags: ['type:ui'],
21            },
22            {
23              sourceTag: 'scope:orders',
24              onlyDependOnLibsWithTags: [
25                'scope:orders',
26                'scope:products',
27                'scope:shared',
28              ],
29            },
30            {
31              sourceTag: 'scope:products',
32              onlyDependOnLibsWithTags: ['scope:products', 'scope:shared'],
33            },
34            {
35              sourceTag: 'scope:shared',
36              onlyDependOnLibsWithTags: ['scope:shared'],
37            },
38            {
39              sourceTag: '*',
40              onlyDependOnLibsWithTags: ['*'],
41            },
42          ],
43        },
44      ],
45    },
46  },
47  // ...
48];
49
To test it, go to your libs/products/src/lib/products.tsx file and import the Orders component from the orders project:
1import styles from './products.module.css';
2
3// This import is not allowed 👇
4import { Orders } from '@react-monorepo/orders';
5
6export function Products() {
7  return (
8    <div className={styles['container']}>
9      <h1>Welcome to Products!</h1>
10      <p>This is a change. 👋</p>
11    </div>
12  );
13}
14
15export default Products;
16
If you lint your workspace you'll get an error now:
❯
npx nx run-many -t lint
1
2   ✔  nx run @react-monorepo/orders:lint  [existing outputs match the cache, left as is]
3   ✔  nx run @react-monorepo/react-store:lint  [existing outputs match the cache, left as is]
4   ✔  nx run @react-monorepo/inventory:lint  [existing outputs match the cache, left as is]
5   ✔  nx run @react-monorepo/ui:lint  [existing outputs match the cache, left as is]
6   ✔  nx run inventory-e2e:lint  [existing outputs match the cache, left as is]
7   ✔  nx run react-store-e2e:lint (877ms)
8
9————————————————————————————————————————————————————————————————————————————————————————————————————————————————————————————————————————————————————————————
10   ✖  nx run @react-monorepo/products:lint
11      > eslint .
12
13
14      /Users/isaac/Documents/code/nx-recipes/react-monorepo/libs/products/src/lib/products.tsx
15        3:1   error    A project tagged with "scope:products" can only depend on libs tagged with "scope:products", "scope:shared"  @nx/enforce-module-boundaries
16        3:10  warning  'Orders' is defined but never used                                                                           @typescript-eslint/no-unused-vars
17
18      ✖ 2 problems (1 error, 1 warning)
19
20
21
22
23————————————————————————————————————————————————————————————————————————————————————————————————————————————————————————————————————————————————————————————
24
25 NX   Ran target lint for 7 projects (1s)
26
27   ✔  6/7 succeeded [5 read from cache]
28
29   ✖  1/7 targets failed, including the following:
30
31      - nx run @react-monorepo/products:lint
32
If you have the ESLint plugin installed in your IDE you should also immediately see an error.
Learn more about how to enforce module boundaries.
Fast CI ⚡
Make sure you have completed the previous sections of this tutorial before starting this one. If you want a clean starting point, you can check out the reference code as a starting point.
This tutorial walked you through how Nx can improve the local development experience, but the biggest difference Nx makes is in CI. As repositories get bigger, making sure that the CI is fast, reliable and maintainable can get very challenging. Nx provides a solution.
- Nx reduces wasted time in CI with the
affectedcommand. - Nx Replay's remote caching will reuse task artifacts from different CI executions making sure you will never run the same computation twice.
- Nx Agents efficiently distribute tasks across machines ensuring constant CI time regardless of the repository size. The right number of machines is allocated for each PR to ensure good performance without wasting compute.
- Nx Atomizer automatically splits large e2e tests to distribute them across machines. Nx can also automatically identify and rerun flaky e2e tests.
Connect to Nx Cloud
Nx Cloud is a companion app for your CI system that provides remote caching, task distribution, e2e tests deflaking, better DX and more.
Now that we're working on the CI pipeline, it is important for your changes to be pushed to a GitHub repository.
- Commit your existing changes with
git add . && git commit -am "updates" - Create a new GitHub repository
- Follow GitHub's instructions to push your existing code to the repository
When we set up the repository at the beginning of this tutorial, we chose to use GitHub Actions as a CI provider. This created a basic CI pipeline and configured Nx Cloud in the repository. It also printed a URL in the terminal to register your repository in your Nx Cloud account. If you didn't click on the link when first creating your repository, you can show it again by running:
❯
npx nx connect
Once you click the link, follow the steps provided and make sure Nx Cloud is enabled on the main branch of your repository.
Configure Your CI Workflow
When you chose GitHub Actions as your CI provider at the beginning of the tutorial, create-nx-workspace created a .github/workflows/ci.yml file that contains a CI pipeline that will run the lint, test, build and e2e tasks for projects that are affected by any given PR. If you would like to also distribute tasks across multiple machines to ensure fast and reliable CI runs, uncomment the nx-cloud start-ci-run line and have the nx affected line run the e2e-ci task instead of e2e.
If you need to generate a new workflow file for GitHub Actions or other providers, you can do so with this command:
❯
npx nx generate ci-workflow
The key lines in the CI pipeline are:
1name: CI
2# ...
3jobs:
4  main:
5    runs-on: ubuntu-latest
6    steps:
7      - uses: actions/checkout@v4
8        with:
9          fetch-depth: 0
10
11      # This enables task distribution via Nx Cloud
12      # Run this command as early as possible, before dependencies are installed
13      # Learn more at https://nx.dev/ci/reference/nx-cloud-cli#npx-nxcloud-startcirun
14      # Uncomment this line to enable task distribution
15      # - run: npx nx-cloud start-ci-run --distribute-on="3 linux-medium-js" --stop-agents-after="e2e-ci"
16
17      # Cache node_modules
18      - uses: actions/setup-node@v4
19        with:
20          node-version: 20
21          cache: 'npm'
22
23      - run: npm ci --legacy-peer-deps
24      - run: npx cypress install
25      - uses: nrwl/nx-set-shas@v4
26
27      # Prepend any command with "nx-cloud record --" to record its logs to Nx Cloud
28      # - run: npx nx-cloud record -- echo Hello World
29      # Nx Affected runs only tasks affected by the changes in this PR/commit. Learn more: https://nx.dev/ci/features/affected
30      # When you enable task distribution, run the e2e-ci task instead of e2e
31      - run: npx nx affected -t lint test build e2e
32
Open a Pull Request
Commit the changes and open a new PR on GitHub.
❯
git add .
❯
git commit -m 'add CI workflow file'
❯
git push origin add-workflow
When you view the PR on GitHub, you will see a comment from Nx Cloud that reports on the status of the CI run.
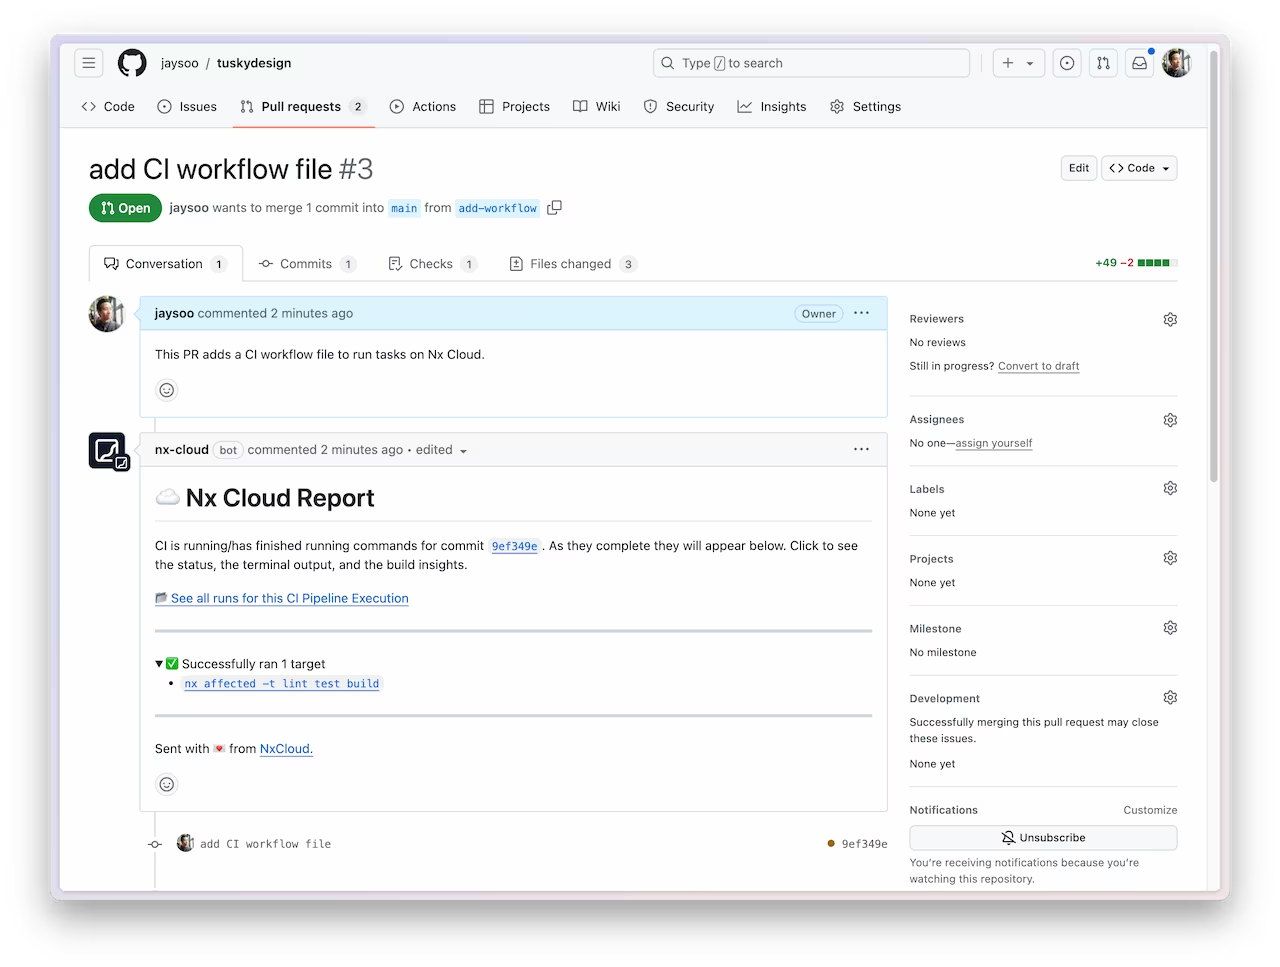
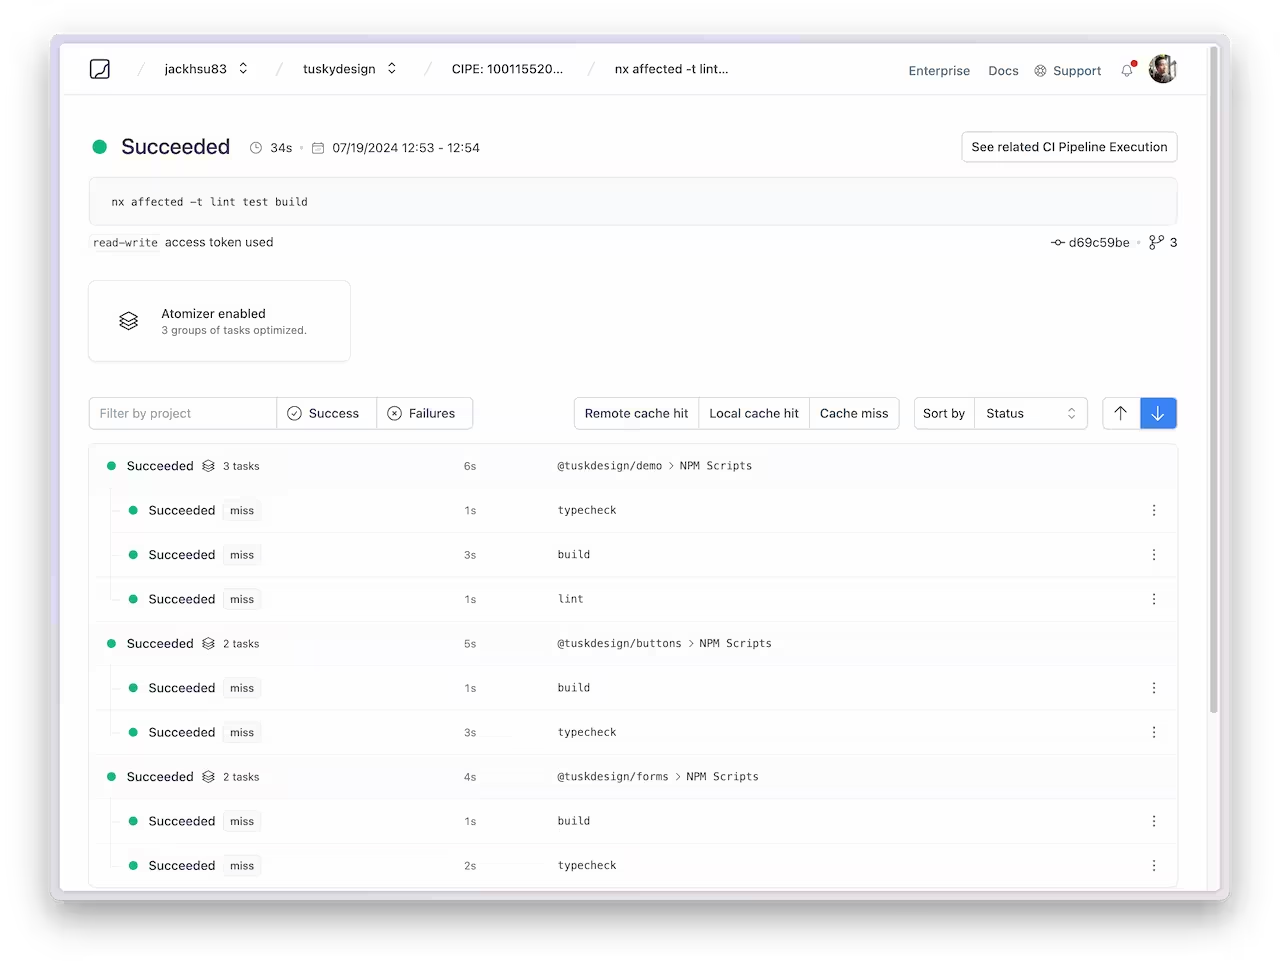
The See all runs link goes to a page with the progress and results of tasks that were run in the CI pipeline.
For more information about how Nx can improve your CI pipeline, check out one of these detailed tutorials:
Next Steps
Here's some things you can dive into next:
- Learn more about the underlying mental model of Nx
- Learn how to migrate your React app to Nx
- Learn how to setup Tailwind
- Setup Storybook for our shared UI library
Also, make sure you
- ⭐️ Star us on GitHub to show your support and stay updated on new releases!
- Join the Official Nx Discord Server to ask questions and find out the latest news about Nx.
- Follow Nx on Twitter to stay up to date with Nx news
- Read our Nx blog
- Subscribe to our Youtube channel for demos and Nx insights